Showing posts with label how to. Show all posts

Sunday, August 25, 2013

0 Tutorial install ClockworkMod Recovery 6.0.0.3 on HTC Sensation

The recovery mode is absolutely necessary when you need to do some customize on your phone, whether it updates or alter flash ROM, so follow how to install cwm on htc sensation. For this reason it is essential that your device has at least one, and ClockworkMod recovery, of course this android recovery mode that can be considered as one of the best recovery available, so if you have a HTC Sensation, here are the steps to follow if you want to install CWM recovery v 6 on HTC Sensation without wasting more time.this perfect and more userfriendly
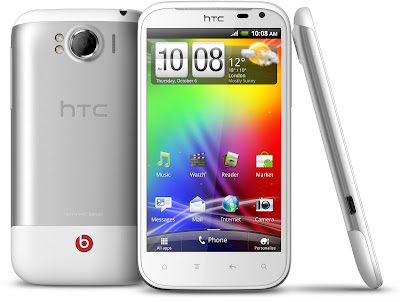
install cwm on HTC Sensation

Requirements


  • HTC Sensation with S-OFF.
  • ClockworkMod Recovery image files. download by paste this url to your browser http://adf.ly/FssEz. You can read another cwm feature on latest cwm v6 download
  • Backup all data to avoid unwanted losses.
  • Your battery state at least 80%.


How To Install Clockworkmod recovery on 6 On HTC Sensation

  1. Download the recovery image file and rename the file PG58IMG-cwm-6.0.0.3-pyramid.zip file to PG58IMG.zip. And then copy the renamed file to your phone's SD card. Do not place it in any folder.
  2. Turn off the device.
  3. Start the phone in HBOOT mode, turning on the phone while you press the Volume Down key.
  4. Once it turn on will appear the message "Do You Want To Start The Update?" Press the Volume Up key. then the install cwm process will start.
  5. Once the procedure is completed, select Power Off to reboot your phone, and when it is restarted, try and delete the file PG58IMG.zip from the SD Card otherwise when every time you enter into HBOOT mode your device will start the CWM installation process .
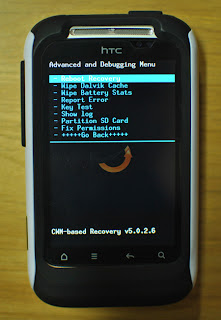
  6. Then start your phone in HBOOT mode. Use the Volume keys and select the entry recovery. At this point, select it using the Power button to start the recovery mode.


Surprised? A process is so simple for something so useful right?. Now the installtion process of cwm on HTC Sensation smartphone is finished, if you want to follow other tutorial for teak your android, stay here on android tutorial guide blog

Friday, August 9, 2013

0 How To Delete Instagram Profile And Save Photos

At this post i will discuss about Delete Instagram profile as we know today there is a new about instagram, the well known social network pictures sharing, has changed the terms of the privacy policy which will come into on 16 January 2013, to anyone who wanted to understand what causes all this, strongly recommend reading the post in Instagram privacy policy update. Since Privacy is something that is very important for every people, this time perhaps many instagram users will maybe not very happy with the change og the term of sevice because the image will be exploited, for other free and commercial purposes, then many people are thinking right to remove or delete instagram account.this perfect and more userfriendly

Let's see now how to save and download all the photos from instagram and then remove the profile.
backup instagram phots and delete account

How to Save Photos

As before, some will want health Instagram recover what they've accomplished throughout the residence time, we may use a service that allows us to download a photo in a package.ZIP, then just then open it and inside there will be the entire contents of our profile. The service in question is called Instaport.me so now go to instaport

Simply login using Instagram to initiate downloading files on your computer. Or for more detailed tutorial you can read on how to backup and download instagram photos and install instagram on android tablet


Delete Instagram Profile
Unsubscribing is easy, you can find the link for removal at this address. Just connect and on that page you will find the link to the delete your instagram account, remember that once you have removed your account you will lose all the images and the profile will no longer be recoverable in any way.

NOTES
If you are deleting the account for the fact concerning the change of the terms of service, please wait a few days, as the news is fresh and there could be further changes or even backwards. We will keep you updated on any news story.

Wednesday, August 7, 2013

0 Play Playstation Games On Android Smartphone

Many people are still love their game on playstation, and many of them want to play playstation games on android phone although now maybe playstation is not so popular like in the beginning of 2012. Since the release of the first android smartphone until today the games on it have had an increasingly important role, increasingly improving the quality and performance. Currently the games on Smartphones and tablets are crushing sales of the console.

I think we all played at least once to the Playstation. And from July 25, that we can play on all android phones to high-end and extraordinary efforts by ZodTTD. Now that this playstation emulator for Android named Fpse is available for download from Market, a nice tutorial could be really useful, especially for some people who seem to have difficulty in the configuration.this perfect and more userfriendly

Before start the tutorial maybe you will interest to try this : RPG game for android
Fpse supports various Rom formats including ISO, BIN, IMG, PBP, Z, and EBOO. Most Roms are not currently supportatti ECM format. This tutorial step-by-step explains how you set up Fpse for android
playstation games on android phone

Requirements

  • Application: download the apk from Market FPse for Android and install it. download fpse from market
  • Bios: download the BIOS file scph1001. paste this url to browser http://adf.ly/GFN4F


How To Install PLAY STATION EMULATOR On Android

Here is the tutorial how to install playstation emulator for android smartphone
  1. Upload the BIOS file in your phone, in any folder, I chose externalSD/game/bios/scph1001.bin
  2. Loads the rom of your games on your phone, I chose the externalSD folder/game/ROMs/
  3. Start the emulator.
    - Steps to be executed only the first time:
    Menu key on your Terminal, choose settings-> system-> bios loading-> and select the location where you saved the BIOS, in my case externalSD/game/bios/scph1001.bin, return to the previous menu, go down under and tapped to default config save.

    Steps to run at every boot:
    - Menu key on your Terminal-eject and start a game, it will ask you where to look for it, the folder that you selected previously, in my case externalSD/game/ROMs/
  4. Compatible ROM formats: .bin. nrg Iso .img


Possible problems:
  • If you have problems to load the bios do as follows :
    Load the bios and disable the HLE mode, then tapped to default config save. Upload a game, go into the settings and load the bios again, come back to the game, exit the emulator indented and should work now.
  • If you have problems with the bailouts do as follows:
    Settings menu disabled HLE mode, select the bios right, choose the folder where you want to store saved games (I selected the Save roms) and then RESET, you will see that it will work for sure.
Ok thats it. Now you can enjoy and play playstaion games on android smartphone. Don't forget to share to your friend if you like this article. see you in another android tips and trick.

Thursday, July 25, 2013

0 Run Android Apps on Windows With BlueStacks

Maybe you Have not heard about BlueStacks, with bluestack you will able to run android apps on Windows PC or laptop.  Before I have presented about this software. you can read about install WhatsApp on PC, because to do that you use bluestacks as the virtual machine to install whatsapp. So now you can use or install Android apps on Windows. Today they released the first beta version ( direct download ). After installing BlueStacks you have a virtual machine with Android "on the run".Android is good


how to run android apps on windows


Preinstalled find some apps ( Evernote , Pulse Reader, Docs to go ...) others (the remaining 450,000 from the store in the world) can also to be installed with bluestacks. Angry Birds or Cut the Rope, Space gamble Android on a PC? No problem. Yes, BlueStacks is easy to install and operate. However, I wonder why the software still the use age-old Rocket Dock installed, which I last saw on Windows XP times. These docks are not outdated. What else is there to say?

BlueStacks : Run Android Apps On windows


install bluestacks on windows

BlueStacks will offer the package and the costs after the beta period. Then, some pay apps in its package. Also want to make the synchronization of the BlueStacks Android Smartphone is possible, Cloud Connect is called the fun.

So as BlueStacks is certainly not bad idea that will allow you run android apps on windows, personally I can say for that I will not be installing this software well - by my Android Smartphone, I simply do not need it, and when, do I install Android on your PC . Is hard to explain - BlueStacks strikes me as non-alcoholic beer. It tastes really, does not feel right. If you like it maybe you will use it, but for me i don't interest on it. 

Tuesday, July 16, 2013

0 How To Flash Jelly Bean 4.1.2 on LG Optimus Dual

Finally cyanogenmod 10 android 4.1.2 is available and ready to flash it on LG Optimus Dual whenever you want. In addition to the novelty of the last days in the house that LG saw the presentation of the new Nexus 4 by LG produced in collaboration with Google, we also have the first CyanogenMod 4.1.2 Jelly Bean for the LG Optimus Dual smartphone, a really important news for owners of this device that will be able to upgrade to the latest version of Android version. An update really stunning if we think that at the official level this smartphone is still waiting for the official update to Android 4.0 ICe Cream Sandwich.Android is good
flash cm 10 android 4.1.2.on lg optimus dual

Obviously being the first version of CyanogenMod ROM 10 with Android 4.1.2 Jelly Bean we should not expect everything to work perfectly, but those who want to update your LG Optimus Dual may do so by following the tutorial in the guide below.

Requirements

Please note that this ROM is based on partitioning and bootloader Gingerbread (Android 2.3.4), we must then install it from a stock ROM (official) or Custom Gingerbread (Android 2.3.4).

Flash Cyanogenmod 10 android 4.1.2 On LG Optimus Dual

follow the instruction below to flash android jelly bean on LG Optimus Dual
  1. Start the phone in recovery using the "POWER" + "VOL -" ... press and hold Vol Down, then also press the power button, and keep both buttons pressed until the screen lights up with LG logo , then let the buttons and you will access the recovery mode;
  2. Perform a Nandroid Backup (Menu Backup / restore of CWM recovery);
  3. Perform wipe data / factory reset;
  4. Perform wipe cache;
  5. Run Wipe Dalvik cache (advanced menu of CWM);
  6. Install the package called "cm-10-20121030-NIGHTLY-p990.zip" (menu flash CWM):
  7. Install the zip of gapps.

Now just restart your device and you're done.

Possible problems that may occur in the procedure:

  • I flashed the ROM and gapps then I rebooted, but stuck on start screen, so remove the battery and unplug the power battery, put the battery back and turn it on manually. In the case remains still standing on the startup screen, disconnect power and battery, reinsert battery, boot in recovery CWM using Vol Down + power combination and rebuilt after the three wipes, flash again the ROM and gapps.
  • I flashed all, it is on but I do not see the camera app: reboot into recovery, flash again the gapps without wipes, restart then should be visible the Camera app.
I hope this instruction for tutorial flash jelly bean 4.1.2 on LG Optimus Dual can help you. So after finished the installation process now you can fell the taste of jelly bean.

0 How To Flash Cyanogenmod 10 on LG Optimus Black

Good news for all those who are the owners of the smartphone LG Optimus Black, Because has been released the new ROM stable CyanogenMod 10 for this device which is customized with the new operating system Android 4.1 Jelly Bean. Today we will see the guide to install this new ROM, we will give the instruction as clearly we can so you can understand it easily. So let's see the tutorial installation below.Android is good

flash cyanogenmod10 on lg optimus black 10


requirements that you have to install with this new ROM:
  • you already have root acces on your lg optimus p970
  • have installed ClockworkMod Recovery
  • Nandroid Backup (recommended)


Tutorial Flash LG Optimus Black P970

Follow the step below for instruction to flash cyanogenmod 10 on lp optimus p970
  1. first download the ROM list in this page ;
  2. download the Google Apps from here ;
  3. copy both files to the SD;
  4. Put the device in recovery mode (with Clockworkmod);
  5. perform wipe data / factory reset, wipe cache partitions;
  6. hour position yourself in the "advanced" tab and wipe Dalvik cache;
  7. now select "install zip from sd card" then "choose zip from sd card";
  8. select the file and confirm the CM 10;
  9. Now the last step, select "install zip from sd card" then "choose zip from sd card" and choose the file of Google Apps and confirmed, now wait for the the process finished and restart the device.
Read also anoither tutorial: install cyanogenmod 7 On Lg optimus Speed

For those who coming from a previous version of CynogenMod 10 official must follow the following guidelines:
  • first download the ROM above.
  • copy the file to the SD card;
  • go to recovery (with CWM);
  • select "install zip from sd card" then "choose zip from sd card";
  • select the file of the CM 10 and confirm, wait for the operation to finish and restart
OK thats for the tutorial flash cm 10 on lg optimus P970, i hope this can help you that want to use the cyanogenmod which is the most popular custom rom.

Thursday, June 13, 2013

0 How To Remove Yellow Triangle On Samsung Boot Up

This post is to provide some guidelines on how to reset binary counter and how to remove the yellow triangle (Exclamation mark) on the Samsung smartphone model after the root.

Rooting an Android smartphone there are advantages and disadvantages when doing teh root process. Among the disadvantages is the root is will void the warranty of your Android smartphone or your warranty will be lost. For you who use smartphone that produced by samsung every time you do a flash of firmware, binary counter will be increased and the use of rooting (but not all) will cause your smartphone display Yellow Triangle Exclamation mark every time you boot up.Android is good

remove Yellow Triangle Exclamation Mark

Basically, your smartphone is still functioning normally. Binary counter function is used by Samsung to determine whether a smartphone that has the root or vice versa, while the yellow triangle (Exclamation mark) may also cause you to feel uncomfortable every time reboot. To do so, follow the tutorial below to reset binary counter and the yellow triangle (Exclamation mark) using the Triangle Away on your Samsung Android Smartphone.

NOTE: To view the status or the number of binary counter, enter Download Mode. (Turn Off The Phone -> Vol Down + Home + Power -> Continue).

Applications Triangle Away - (root only)

Use application Away Triangle developed by Chainfire was able to reset the binary counter and triangle away (Exclamation mark) from your Samsung smartphone.
  • Version: 1.7
  • Updated: 18 July 2012
  • Android Version: 4.0 and above
Phone Model:
  • Samsung Galaxy S2 GT-I9100
  • Samsung Galaxy S2 SGH-I777
  • Samsung Galaxy Note GT-N7000
  • Samsung Galaxy Note GT-I9220
  • Samsung Galaxy S3 GT-I9300

Download Applications Triangle Away


  • Download [root] Triangle Away: Google Play Store ($ 1.84)
  • Download [root] Triangle Away apk: XDA Link (Free) - updated version can be obtained from here.


WARNING: DO NOT USE THIS APPLICATION ON MODEL IS NOT LISTED ABOVE. THIS IS A DANGEROUS OPERATION AND BRICK YOUR DEVICE Could Potentially. PROCEED AT YOUR OWN RISK.


How To Binary Counter Reset And remove Yellow Triangle Using Triangle Away
NOTE: Make sure your smartphone is connected to the internet / WiFi.

  1. Download applications Triangle Away from the link above, and install it to your smartphone.
  2. Run Triangle Away application, and select Continue in the display Confirmation Model. (Make sure your smartphone model is accurate, if not DO NOT proceed)how to remove yellow triangle on boot
  3. Triangle Away will download the necessary data.
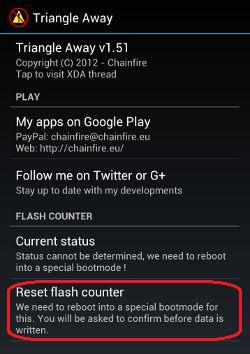
  4. After fininshed update data, select Reset Flash Counter.
    WARNING the display, click Continue.
    your Smartphone will be rebooted into bootmode special.
    how to reset binary counter on android
    Triangle Away Special Bootmode
  5. All information on Flash counter and Binary Status will be displayed.
    Press Volume Up to Continue button.
    Triangle Away will reset counter flash and binary status smarphone.
    Your Smartphone will Auto Reboot.


Done!
If all goes well, the yellow triangle (Exclamation mark) will not appear again during the boot up process and the binary counter will be reset to (0). To be sure, enter Download Mode.

To restore your smartphone to the normal state (out of box), make sure you flash using the stock ROM / firmware from Samsung. Stock Firmware for Samsung smartphone model can be downloaded from SamMobile.com .

Wednesday, June 12, 2013

0 How To Unroot Galaxy Young

Well for those of you who have done rooting on Galaxy Young, would be more free to make modifications to the system, whether it be change rom, overclocking the processor, battery calibration, backup all apps + data, and others. But what if suddenly your galaxy young is damaged. In fact, the service center will refuse warranty service if your Young Galaxy have in root. So you need to unroot it first to give back the warranty. So in this tutorial i will explain how to unroot galaxt youngAndroid is good
tutorial unroot galaxy young

Relax, there is another way. By using unroot. Unroot is a way to remove the root so your galaxy young will back like it was before in the root. Now with this you can return the warranty of your galaxy young.

Read First

If you perform these steps carefully, then you can successfully unroot.
Do with your own risk

Note: Doing unroot basically like you do root. Recommended backup of all data.

Tutorial Unroot Galaxy Young


  1. Download unroot-update.zip file here
  2. Put the file on the SD Card. Do not be extracted, and do not be put in a folder
  3. Turn off the Galaxy Youngmu
  4. Go to Recovery Moder with press Volume Up + Home Button + Power Button
  5. Select Apply Update from SD Card
  6. Choose unroot-update.zip
  7. Wait, and if the process has been completed select Rebbot System Now
  8. Done! Congratulations you have been on the Galaxy Y unroot


If you are still having SuperUser application, the application can not be opened. Therefore just uninstall SuperUser application and also do not forget to uninstall other root apps.

Monday, June 3, 2013

0 How To Enable MULTI-USER Support On Android 4.1 Jelly Bean

Once on my previous pot i have been discussed about android multiple user account feature on Jelly Bean, so today i will discussed it more specifically. Android Jelly Bean has many features that provide a quite simple user concept with extensive possibilities. Some features are very obvious and easy to find for the end user, other functions have to be found only by experimentation. We'll show you tutorial unlock multi-user support on Android 4.1 Jelly Bean. Android is good
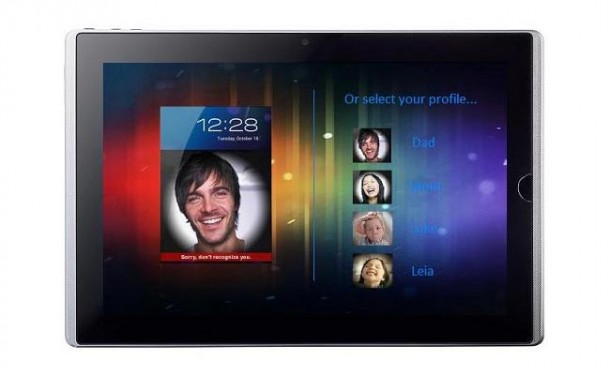
add multiple user account

Especially when several family members share a tablet, it is useful to set up multiple users account on the machine. How this works, you will learn in the following instructions:

Requirements for Multi-User Support

As a prerequisite for multi-user support Android 4.1 Jelly Bean and a rooted smartphone or tablet . You'll need the Android Terminal Emulator app from Google Play

Enable Multi User Account On Jelly Bean Device.

  1. Launch the Terminal Emulator app and type the following commands:
    su
    pm create-user test
  2. So you have created a new user called "test". To switch to this user profile, you need only the power button for a few seconds while selecting the user "test". The new user account you can now configure as desired, for example, set a new home screen and app icons on this place.
  3. To the newly created user account if you wat to remove it from your jelly bean device, start the Terminal Emulator app and enter the following commands:
    su
    pm remove-user 1
  4. Then the account will be deleted from your device
Ok thats for my simple instruction for add multple user account on jelly bean device. see you on another android application news and tutorial.

Monday, May 27, 2013

0 GMAIL ACCOUNT SYNC

Google is so commonly known as the giant of data storage, but are you know exactly if the data the  over your Google account accumulates really? After the initial establishment of a synchronized Google Gmail address data automatically as the saved contacts, your tasks, your photos or calendar. However, it is easily possible to make changes to the synchronization settings. We show below for you how to syncronize gmail account. after all, Google does not know everything. Android is good

Sync Gmail Account On Android Device


1) Open Settings
how to syncronize gmail account
In the settings of your device you will find a submenu called "Accounts & sync". Here you will find all your Android device connected to accounts, such as Dropbox, Facebook, SkyDrive and, indeed, your Google account.


2) What is synchronized?
syncronize gmail account
If you are here on "Google" types, you can get an overview of all the data that have been synchronized. In addition to the contacts normally, data such as photos, calendar, your email or your tasks are automatically synchronized.


3) Pros & Cons
sync android 42 gmail
One should not condemn this approach generally, it also offers certain advantages such as How if your smartphone lost your data and contacts, for example, you can relief becauese your data not lost. your data still saved on google storage data. So if you need it again you can sync with the step that i have mentioned, Google on the other hand has access to much personal information.


4) Make changes
instruction syncronize google mail
In which you remove the check mark next to the entries, you can determine that some data will not sync with your Google account. This way, you can synchronize google account data at any time manually.

Friday, April 26, 2013

0 How To Install Custom Rom On Wildfire S

This is my last tutorial article that discusses about HTC Wildfire S. In this tutorial, will be explained more how to install the Custom ROM. In two discussions on Wildfire S (WFS) before, namely about how to Unlock Bootloader and Root WFS. Now is the time on how to optimize this Smartphone. So Internal Storage can much relieved, and UI look more awesome.

There are some Custom ROM recommended by some of Developer. Among Cynogenmod and Jikantaru XE ROM. But I will not explain all the ROM but only Jikantaru ROM XE. You can consider from the cool side of the UI as well as some optimization features. Okay before I guided step by step, it may be helps if i show results of Installing Custom ROMs Jikantaru XE ROM first. Android is good

jikantaru for htc wildfirejikantaru rom for wildfirejikantaru rom download

In this tutorial I assume that all of you has already made ​​the two previous stages, the Unlock Bootloader and Root HTC Wildfire S. So, no need to prepare a lot of things anymore. you just need Only required file JikantaruROM XE Custom ROM.

READ FIRST

  • To do this tutorial you must have root your phone, read how to root htc wildfire s
  • You must have Unlock the Bootloader
  • It should be noted before installing custom ROM, it will be better make nandroid backup ( bakcup the ROM Default first.) Just in case if you want to revert to the original ROM.
  • Okay, time to start the ROM installation phase.

DOWNLOAD JIKANTARU : Download here

Tutorial Install Jikantaru Rom On Wildfire S

  1. Keep in mind, in order to install this Custom ROM, requires a memory partition. There are many ways you can do. Most use "Mini Tool Partition." But I think it is less effective and according to some sources sometimes partitions using this tool can be lost so that the application installed on the SD card can be error. In these applications base on Windows, whereas Android is Linux. So in my opinion is safer to use CWM Recovery that also base on Linux, partitions is more easily, quickly, and accurately. If you want to use SD or memory capacity, choose a good quality.
  2. How to make partition: first go into HBOOT by
    turn off your phone, remove the battery and reinsert it. Press the Volume Down button followed by Power (Volume Down + Power).
  3. Once logged in HBOOT. Pick parts that go into CWM Recovery Recovery.
  4. Once inside the CWM Recovery. Choose Wipe Data / factory reset.
    install jikantaru on wildfire
  5. After completion select Wipe cache partition.
  6. Select the Advanced tab.
  7. In this section, select Wipe Dalvik, then Format SD card. Format SD card to make it really clean so could be perfect partition. Partitioning can be done in many ways. It is up to use which method.
    cwm install jikantaru
  8. After the SD card Format process completed, its partition time. Since I use 2 GB SD capacity. Then I will make partition into two (2). The first partition to EXT2 format applications, the second partition for storage, let the rest for cache memory.
  9. Choose Partition SD Card, then I fill the first 500MB partition, then select o.
  10. After partitioning is completed next install the downloaded ROM. Copy the ROM by going to mounts and storage. after the drive appear, copy the ROM file into the partition that you have made. then Unmount back.
  11. The last step select Install zip from SDCARD. Select the copied ROM file and wait.
  12. Once the process is complete, do the boot. Congratulations you have successfully installed a custom ROM.

Ok, that for tutorial today on How install Custom rom on HTC Wildfire s, which is this time use jikantaru ROM. i hope it helps you. please comment if you want to ask me.

Monday, April 22, 2013

0 Consumed Data Volume Telecom Flats Charge And Query

Is actually someone here use T-Mobile? If so, you'll probably know the following problem: At some point in the month you reach an SMS in the telecom and reports that your monthly data volume is used up. Mostly this message is frighteningly early and unexpectedly. Therefore, it can not hurt, the data volume on a regular basis to keep in mind. Since the early 2012's thanks to the speed on option finally possible without major problems. Android is good

consumed data volume

To query the data volume in your T-Mobile data charge you can do by visit the site http://pass.telekom.de . There, the actual consumed volume is displayed directly in MegaBytes and your monthly limit. The whole thing is also thanks to an independent update that always can quite reliable. You can access the page by those way so many times as you want, since the traffic is not generated here is purely in your data plan. So worth it then also you can bookmark it for regular visits.

Speed ​​On The site also offers yet another added value if you are in the Call & Surf Mobile and Complete mobile data charge. If you have in a month, the flat rate to very strained, you can from here, the data volume of € 4.95 be reset to zero - and it works even several times a month.

In the current state of my flat, it will last until the first data reset not be long. Have you been acquainted with the speed option on made?

Thursday, April 4, 2013

0 Tutorial Create Swap Memory On Android Smartphone

Create Swap memory on Android Phone - For you that have hobbies tweaking your computer must be have familiar with swap memori. But here I will probably help a little bit to explain what the function swapper 2 for your android phone. Swapper2 is one of android application that can support the performance of your smartphone memory consumption, by taking memory support which is usually from sd card, then be supported or send to main memory to increase the performance of your android device when running an applications and others. Here's how to use it:

how to create android swap memori


How To Create Swap Memory On Android Phone


First | Using Partitions

  1. Download swapper2 from Play Store

  1. Do not open the Swapper2
  2. Connect your PC to use SDCard with Cardreader
  3. Create Partition into 2 partition with Mini Partition Tool. The format is:
    - Make it FAT32 Partition 1 Primary
    - Make Linux Swap Partition 2 Primary

    example:
    - I use 4GB SDCard
    - 1st Partition : FAT32 Primary 3.2GB
    - 2nd Partition: Linux Swap Primary 500MB
    (For more details on how to partition SD Card via Mini Tool Partition Wizard read Tutorial Partitioning SD card )
  4. Once partitioned, insert into your android device
  5. Login CWM menu / Xrecovery
  6. Wipe Cache Partition
  7. Turn on your debice and enter to swapper2
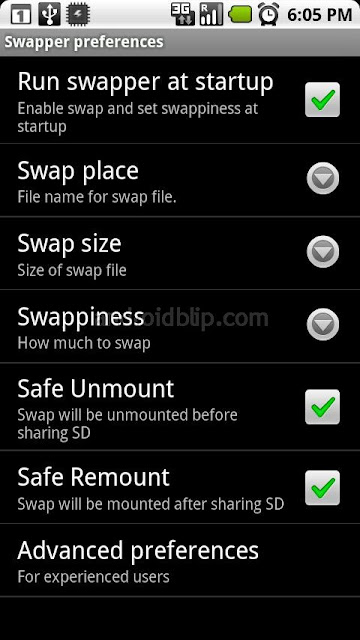
  8. go into the menu settings / preferences in the swapper. setingannya as follows:
    - Check Safe to Unmount
    - Check Safe to Remount
  9. On the menu go to Advance Preference preference and settings as follows:
    - Check the Use Swap Partition
    - Set a Swap Partition / dev/block/mmcblk0p2
  10. Back to main menu Swapper2
  11. And click the On button. Wait for the process is complete.


Second | Without Using Partition can't be more than 256mb:
  1. Open Swapper2
  2. Login on swapper2 preference menu
  3. Click on the Swap Size and choose what that will be swapped (32,48,64, etc)
  4. Back to the main menu and click Turn On Swapper2.


Ok thats for how to expanding you smartphone memory using swap memory.Android is good, I hope this tutorial will help you to overcome the lack of memory on your smartphone. thanks for visting, see you in next android tips and tricks

Saturday, February 23, 2013

0 Move Android Applications to the SD Card without Root With Simple Way

Are your internal memory on your phone full after install some application? read here to found the tutorial to move application to sd card without root your smartphone. When the Smartphone's internal phone memory is full but on the SD card still plenty of space available, then helps app 2 SD. This practical application lets you move apps to the SD card back in the phone's memory.. So the amount of the internal memory will surely fulled by the applications that we install.Look great android

Move Apps From Internal Memory To Sd Card

App 2 SD users with the ability to move their apps on the SD memory card and thereby reclaim disk space in the phone memory. Android Apps, which are by default saved in the phone's memory can be moved without effort. The prerequisite for this is an Android operating system version 2.2. Also, the app you want to move must also admit the move. So to overcome those problem you can move the android application that can be moved (but usually some of existing method needs root acces, example if you have galaxy note 2 you must root galaxy note 2 first).

Then, how do I move the installed application on internal memory to the SD Card Without Root? the answer is to use an android application called App2SD which can be downloaded for free at play store, you can see the App2SD preview below:
move application to sd card without root


In a nutshell, the function of this application is to move the app that was installed in internal memory to external memory or the SD card, or it could be the opposite of external memory to the internal.

How To Move Apps To SD card With App2sd

complete Guide to use app2sd to move Android applications to the SD Card Without Root are:
Each application is opened then you will see some tab ( in this case you will see 3 tabs on it), each of tabs that appear indicates the position of the application. Divided into three, namely, movable (the list of applications that can be moved to the SD card), on the SD Card (the list of applications that are in the SD card or external memory), and the phone only (a list of the applications that are in the internal memory).
Below is preview screenshots of the application along with the 3 bend
how to use app2sd

The Screenshot above is show the amount of application that installed on your internal memory, on the picture above you can see there are 7 apps are installed, to move it you can simply click on the application that you want to move to SD card, then you will meet with a menu like this:
Move to External Memory


Click move to move it to the SD Card and vice versa if the application you want to move are on internal memory. To get App2SD which is used to move the android applications to the SD card without rooting, you can go straight to the official google page play by clicking the link below:
Download App2SD from google play
Read also : you also can raise your internal memory with this : how to use link2sd from android tips and tutorial

If you want to know more clearly guide you can see video tutorial on how to remove android apps to the SD Card without root and App2SD below:


So now you can raise internal memory capacity

0 Tubemate : Download Youtube Videos From Android Phone

There is some app that allows us to convert and download videos from Youtube in better format as mp4 and in the case of course music to mp3. Save your favorite Youtube videos on your Android smartphone has never been easier, much simpler than many procedures to do it on PC. Let's see how to do everything via TubeMate.
One of the most popular uses for android smartphone or devices is to take advantage of streaming videos, contect, films, television and music and one of the most common ways is through the FLV format. However, it is a disadvantage to save FLV content as it is much more problematic playback and quality suffers.this perfect and more userfriendly

Download Youtube Videos With Tubemate

One of the reasons for the android smartphone holders pride's  against those who have an iPhone or iPad is that you can see and download youtube videos without having to jailbreak.

The whole thing is very simple thanks to a TubeMate most useful programs from across the media category of the Google mobile operating system.

It must be said that for unknown reasons, while the android market does not always display all programs, doing a search with the name of the program you might find the suggestion to name the application "tubemate" (which proves that is part of the market), but without that then manages to find the installation file don't worry because there is a very easy to install and maintain for future reinstallations.

DOWNLOAD TUBEMATE
First we go into the android settings to enable the installation of external programs to market (as shown in the following image), then from your browser go to the following address : download tubemate and download the program directly from the official site.

download youtube videos from android phone

You can download this directly from your phone or from your computer, in the latter case, you must then pass the apk file in the Terminal manually, via usb, wifi and microsd (depends on the characteristics of your Terminal). After installing you can enjoy and download youtube videos from android

Anyway, I recommend that you save the file for future use, because even if they are new versions (tube mate enjoys an excellent support from its authors who update often enough) the program will first check start looking for any available upgrades and offering direct updating. Now lets continue to the tubemate settings part

How To Download Youtube Videos From Android Phone

  1. Download tubemate, if this link doesn't work you can find the download link from the picture above
  2. Using the search function at the top right will write the name of the clip that interests us
  3. Select the video from Youtube
  4. In the window you will find the Save button
  5. Choose the type of format that you want
    download videos with tubemate
  6. Once chosen we can monitor progress in Menu-> Download

Finish, Now after read this i hope you can enjoy youtube videos anytime you want on your android phone by download it and save to your memory

Friday, February 22, 2013

0 Get Back Warranty On Galaxy S3 Or Galaxy Note 2 After Rooted

In this guide today i will explain how you can restore the warranty of Samsung Galaxy S3 and Galaxy Note 2. In the case where the warranty have been carried out by modding, root or super user, installing new kernel, and installing custom recovery may cause you void your phone warranty .
In particular, this guide is aimed at those who have installed in your phone:
  • custom rom
  • modified kernel
  • Cf-Root
  • root or recovery change

Warning
  • Before proceeding, we recommend that you backup your personal data (Sms, contacts, files, internal memory, etc.) and nandroid backup Read how to make nandroid backup
    The warranty repair procedure may delete the personal data contained in your phone.
  • Before start the process to restore the warranty read entirely the guide below and then follow it step by step.

How to get back warranty on Samsung Galaxy S3 or Galaxy Note2

Step 1
The first step will be to restore the custom binary counters and system status using Triangle Away (to use it requires root permissions).
Attention : do not abuse the tools because it acts on the bootloader on your phone. To date, however, no negative experiences were detected.
  1. Download on the phone the latest version of Triangle Away
    On the Xda forums is this apk is free version (annex TriangleAway-vX.XX.apk). Install it by clicking on it.
  2. Start the app and remember to grant the rights to root (a popup will appear later).
    If prompted, confirm the additional data download (6 MB).
    how to restore warranty for galaxy s3
  3. Start Triangle Away.
    The first time, you will be asked if the device has been properly recognized.
    If so, confirm by clicking Continue.
    remove triangle exclamation on galaxy s3
  4. Now Click the button Reset Flash counter and confirm by clicking continue.
    binary counter reset for galaxy s3
  5. The procedure automatically reset the binary counter.
  6. In some situations, the device may restart in a special mode.
    If this is your case, to proceed to the setting the counters to zero press the Volume up
    Otherwise, to cancel the operation, press the volume down button.
    Caution : do not turn off or reboot the phone by use power button.
    triangle away galaxy s3   Guida completa al ripristino della garanzia sul Samsung Galaxy S3 e Note 2
Step 2
After reset the binary counter, now we will flash Original samsung firmware with Odin, this will erase all traces of custom rom, kernel or recovery.
  1. Download the original Samsung Firmware that you match with your model. For Galaxy S3 - for Galaxy note 2.( i will attach the link soon)
    Important: If you have installed at least once (even in the past) a Jelly Bean 4.1.2 firmware, always use the same version (no Jelly Bean 4.1.1 or earlier).
  2. Start odin (download latest odin) and on PDA field choose the firmware extracted from the downloaded archive (the final extension is displayed in the field must be .tar or .tar.md5).
    restore warranty for galaxy note2
  3. Enter to download mode
    By phone off press the buttons VOLUME down +HOME + POWER and wait until you'll find yourself within the following screen.
    Confirm by pressing the Volume Up button.
    enter download mode on galaxy s3
  4. Connect your smartphone to your pc via usb and, after recognized by odin (the field ID: COM will turn green), click Start.
    flash official firmware on galaxy s3
  5. You will now install the official firmware and discarded every firmware track of custom modding.
  6. When finished the phone will reboot automatically.
    If your galaxy note 2 or galaxy s3 stuck in the start-up phase (more than 10-15 minutes), perform a hard reset by recovery: read how to do hard reset.

Step 3
The warranty repair procedure has not yet ended.
  1. Turn on your phone, go into Settings > device Info > State.
    If the device entry is normal, you can skip this step.
    But if it shows CHANGED or "Modificatio" as in the following image, you must continue this step
    device status are in changed
  2. To change the status from changed to Normal, you must perform a factory data reset (hard reset).
    From the menu Settings > Backup and restore , click Restore factory data.
    factory data reset on galaxy s3
  3. On the next screen, confirm by clicking on reset the device and wait until the end of the formatting.
  4. Make sure that the counters in download mode are all cleared and the status of the device is normal
Step 4
For more security, please also check if the CSC is present in the original firmware of the phone.

The procedure of warranty repair For Samsung Galaxy Note 2 Or Galaxy s3 is now completed.
You will not be able to be traced back to any modding operations carried out on the phone.

0 How To Fix Soft Brick On Android Smartphone

I write this article How to Fix Soft Brick to asnwer all the problems and all the miss understanding about what is hard brick and also soft brick on android smartphone. many of android users still do not know what is the definition about these two issues. Explanations written in this article is i get from some understanding of my study and reading at xda developers. can edited more simply and look great
how to fix softbrick

WHAT IS HARD BRICK

The term of hard brick is used in an android smartphone when you experienced a problems after doing the Unlocked Bootloader on xperia x8, galaxy ace, and also for another phone. It happened due to an error step when unlocked bootloader because the "production code" that allowed for unlocking is more / higher than it should be used in unlock bootloader process.
For example, the Xperia X8 hardbricked apply if production code is higher from the phone with 11w26 code. example 11w27 28 29 30 and higher.


HARDBRICKED CHARACTERISTICS

  • Phone no signs that can turn on directly
  • The Charge does not work.
  • Phone not detected when connected to a computer
  • The LED does not light up immediately
  • No vibrate
  • Your phone completely off


If hardbricked happen to your phone, it can not be repaired using SEUS, FLASHTOOL or even PC COMPANION. Why can not be fixed with software above?

As I already explained, the signs are hardbricked your phone can not detect by computer. Third software requires the phone to be in detect before the repair / upate to be done. So, if your phone were hardbricked and can not detect by software , how could it be done?


WHAT IS SOFT BRICK

Softbricked terms apply if your phone has certain problems. softbricked usually occurs after installing the custom rom or you are wrong in doing something that is not appropriate install [not compatible] with each phone.


SOFT BRICK CHARACTERISTICS

  • Phone choked on vendor logo.
  • Phone choked on a logo "bootanimation"
  • and others.

SOFTBRICKED AFTER INSTALL CUSTOM ROM

  1. Rom used does not match the type phone.contoh korang rom samsung go phone sony ericsson install close.
  2. Google Apps is not installed after finish flash rom rom.Sesetengah korang need to flash / install google apps flash rom finished after a moment. Examples of such rom minicm7.
  3. Rom does not match with the installed kernel that you use. Actually there are 2 types of rom stock  rom  kernel and custom kernel rom . Stock rom is for those who the bootloader still locked. Custom kernel rom for their that already have unlocked bootloader and flash the kernel.
  4. Not do a full wipe / wipe data / factory reset and wipe cache after flash rom will also cause softbricked korang experience.
  5. Do not follow the install directions carefully.

How to Fix Soft Brick On Android Smartphone

The principal things to repair soft crick on your phones are by flashing the stock rom to the softbricked phone. so your phone condition will similar like re install(like re install on computer). and there will be works properly again. for galaxy s3 you can see how to flash firmware on galaxy s3.
For tutorial How to Fix Soft Bricked on Galaxy Ace, HTC, and another android smartphone, i will post it tomorrow. So Please be patient and keep up to date with this blog. See you :)

UPDATE
if you use Sony Xperia see this tutorial How to Fix Soft Brick on Xperia via SEUS

0 How to Customize Android Lock Screen Display

Are you bored with the look of your android lockscreen and want to customize it? Or maybe you want to be creative with makes your own lockscreen? How do I make it? let me share a common custom lockscreen on android.
Before discussing more about how to modify android lockscreen. first prepare the steps and materials that will be used in the custom lockscreen. look great

Requirements

How to change android lockscreen

In this article, I divide tutorial change android lock screen into two section, basic and advanced, with basic method has no risk to you, but if you fail to edit in advance method can cause bootloop when you fail.

Custom Android Lock screen with basic method

  1. Choose one of the lock screen that you want to edit
  2. Download apk lockscreen
  3. After you get the get apk, decompile the apk using maxiedit
  4. Find the graphic files, and edit using imaging applications (common graphic files are in the folder "drawable")
  5. Re Compile the file to be apk file again. then install the apk
  6. Finish and you can enjoy your new lockscreen.


Custom Lock screen with Advance method

  1. Backup framework res.apk then move it on your PC
  2. Edit and decompile framework-res.apk by using MaxiEdit
  3. Open the folder results decompile framework-res.apk, then find the xml file keyguard_screen_tab_unlock
  4. Edit the xml file with notepad + + (already available on MaxiEdit)
  5. Find a line that is writing like below:
    <RelativeLayout android:gravity="center_horizontal" android:id="@id/root" android:background="#70000000" android:layout_width="fill_parent" android:layout_height="fill_parent"
  6. Then change to
    <RelativeLayout android:gravity="center_horizontal" android:id="@id/root" android:background="@drawable/lockscreen_default" android:layout_width="fill_parent" android:layout_height="fill_parent"
  7. Then save
  8. Then create a custom png image, adjust the resolution size of your android device (example, 240 x 300 pixel for QVGA), created according to your creations, and then rewrite to lockscreen_default.png
  9. After done, input the lockscreen_default.png image to the the res-drawable folder / (ldpi-mdpi-hdpi)
  10. Edit also another image file that you want to change
  11. Delete the resources.arsc file
  12. Go into the folder res-layout, remove the file keyguard_screen_tab_unlock.xml
  13. Then compile the framework-apk file and make sure there are no errors when compiling
  14. Perform nandroid backup before you push the framework-res.apk that you have created just in case you failed to edit because it will cause bootloop
  15. Push the framework-res.apk that you compiled earlier to the system / framework
  16. When finished push the framework-res.apk , then reboot your android device
  17. If you are succesfull, then the lockscreen you will become as your creation

Note:

- Both the basic and advance way, note DO NOT CHANGE the size of the image resolution, and image extensions (if .Png then your new file extension must be .Png, if .9.Png then your new file must be .9.Png too. To make .9.png you can read the article that I have provided above by using a 9-patch)
- Make a backup before you edit using advanced ways

Ok thats for how change and customize your android lock screen. see you in next android latest news

0 Extensions Image 9.png Android

If you are an android app developer, is certainly no stranger to the image file with the extension .9.Png. Sometimes some android applications using image files with the extension .9.Png's. In this article I want to share with you about the image with the extension .9. Png.
Before going any further on the image with the extension .9. Png, we first discuss the meaning of .9.Png and unit of measure in the .9.Png.look great


What is .png file ?

PNG (Portable Network Graphics) image format one image using compaction methods do not eliminate the part of the image. Generally used for PNG images in web images. PNG image format has better compression factor than the GIF (5% -25% better than GIF format).

PNG files can work well on images with vivid color separation and graded. PNG files are divided into PNG-8 and PNG-24. For PNG-8 can compress the image with a smaller file size than GIF. While the PNG-24 save the file with a larger size. PNG-24 is commonly used for photographic images or graded, since the resulting image will be sharper. Another plus, PNG supports transparency as in the picture. GIFs.

For the Web, PNG format has three advantages over the GIF format: Channel Alpha (transparency). Gamma (setting the brightness image of en: "brightness"). Impressions image progressively (progressive display) For the purposes of image processing, though the PNG format can be used as an alternative during image processing but the JPEG format is still a better option. (Source: potter )


Wha Is .9. Png File ?

Is a file which is a derivative of. PNG in a single PNG file in use for several sizes. Or simply dynamic image size. Where size is determined from the pacth that is given in the file. Its use is intended to conserve file size. So the use of a static image into a minimum to reduce the file size of the application.

Problems with the .9. Png

  • Android devices come in many shapes and sizes, often making it very difficult for developers to design applications that look great on all screen sizes and a variety of orientations. To address this challenge, the graph can Nine Patch indispensable. In this article, we discuss what Nine Patch graphical format, how it works, and when to use them.
  • Sometimes when we edit the apk or create android application, we have a problem in the process of the application compile, because we forgot to use the image files with the extension .9.Png , therefore, in this article I want to share you about image editing with the extension .9 . png


What is Nine Patch ?
Graphics Nine Patch Android support for image scaling control. Graphic Nine Patch only PNG graphics that have patches, or areas of an image, defined to scale and stretch in the right areas, not the scale of the overall picture as a unit, which often obscures the graphic details. Generally, transparent or solid patch center, with the edge to remain fixed, the other edges are set to stretch, and the corners to remain fixed.

Illustration picture below will explain how an image (in this case, a square) is divided into nine patches.
extension image 9.png on android

When Do We Use Graphics NinePatch?

Graphics that can be stretched to be used anywhere in your application where size chart may vary, particularly useful for:

  • background Button (where text strings of various sizes)
  • Frames (where the picture of the inside should come in various sizes and aspect ratios)
  • Every time you use drawn with at least one dimension is set to wrap_conten


How To Edit Graphic Nine Patch (edit graphics on the apk)
To edit a graphic Nine Patch PNG graphic files using Draw 9-patch tool, perform the following steps draw nine patch tutorial:
  1. Open the / decompile apk file you want to edit by using the way you can find the article that i have make yesterday read how to edit apk file .
  2. Open the folder res / drawable (ldpi, mdpi, hdpi or another folder that contains the graphic)
  3. Edit the images you want to edit them using graphics editor like Adobe Photoshop or other graphics applications though.
  4. Once you are done editing, save the images in the format. Png
  5. Open the application "9-patch.bat" located in the Android SDK / directory "tools". (References: android development )
    image extension 9.png
    -Drag PNG file into the left pane (or use File-> Open NinePatch)
    how to use draw9patchstart
  6. Click the "Show Patch" checkbox at the bottom left.
    tutorial draw9patchstart
  7. Set your patch right scale (higher to see the results more clearly).
    To set the horizontal patch guide, click along the right edge of your graphic.
    To set the vertical patch guide, click along the top edge of your graphic.
  8. If you need to remove your patch, press Shift and click on your pixel (black).
  9. Keep your graphics with the extension .9. Png (for example, maxiandroid.9.png).


If you want to create a graphic file with the extension .9. Png you can find more detailed tutorial tutorial draw nine patch and here


Android tutorial and review Copyright © 2011 - |- Template created by O Pregador - |- Powered by Blogger Templates